Monday, 10 December 2012
Right...due to popular demand I'm going to try and fill in the blanks from the last time I posted to now :)
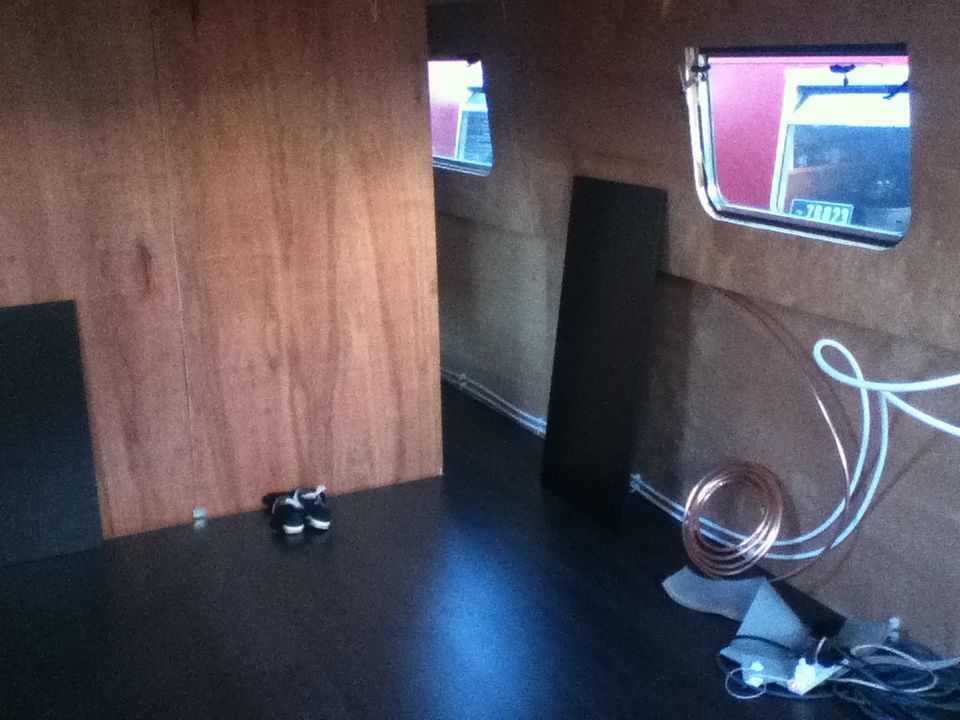
The reason the blogging stopped, was that the family moved on board, so where previous photos would show empty bed bases, those now have mattresses, sheets, duvets. Floors which had carpets, now have computers, waste baskets, kids toys. Walls have picture frames. Empty cupboards have plates, cups, cutlery. Empty floors, have sofas, tv tables, rugs.
The point is...it's very easy to live in a boat, and furnish it, without everythings being "ready for cruising". My initial goal was to make the boat functional to live in. We've achieved that with flying colours. The coal/stove went in...cutting a hole in the roof with a jigsaw was simple...much simpler than I thought it would be...and "anyone can do it". I decided to install the coal stove in the centre of the boat, so the flue went straight up, and didnt need any bends to accommodate the curvature of the roof. Pics will follow.
We've put up curtain rails on the windows, and the curtains are being sewn by a friend. The shower cubicle has been tiled with ceramic tiles.
I've running the toilet flush, the shower waste pump, and the boat water pump (the only 12V circuits currently running), using a battery stored near the bathroom, and permanently on charge using a 220V battery charger.
Before Feb, to turn the boat into a cruising boat, I'm going to have to:
1. Connect up the 3 leisure batteries I've got lying in the engine bay.
2. Connect up the leisure alternator.
3. Install a 12V fusebox.
4. Install the 12V drop lights and wiring.
5. Buy/install an invertor.
You dont need any of those things if you are on elec hookup.
Right now the challenge has been to keep the boat warm as the temps begin to drop. We're using coal in the fire permanently, with a small elec fan blowing the warm air down the boat passage. We have 2 elec heaters which we use very occassionally on cold mornings. The kids cabins are warm enough because their pcs generate quite a bit of heat.
The boat shower is wonderful. Instant hot water from a gas heater. We have no need to run the boat engine for the next 3 months. Hopefully it'll start in Feb/March when we need it to.
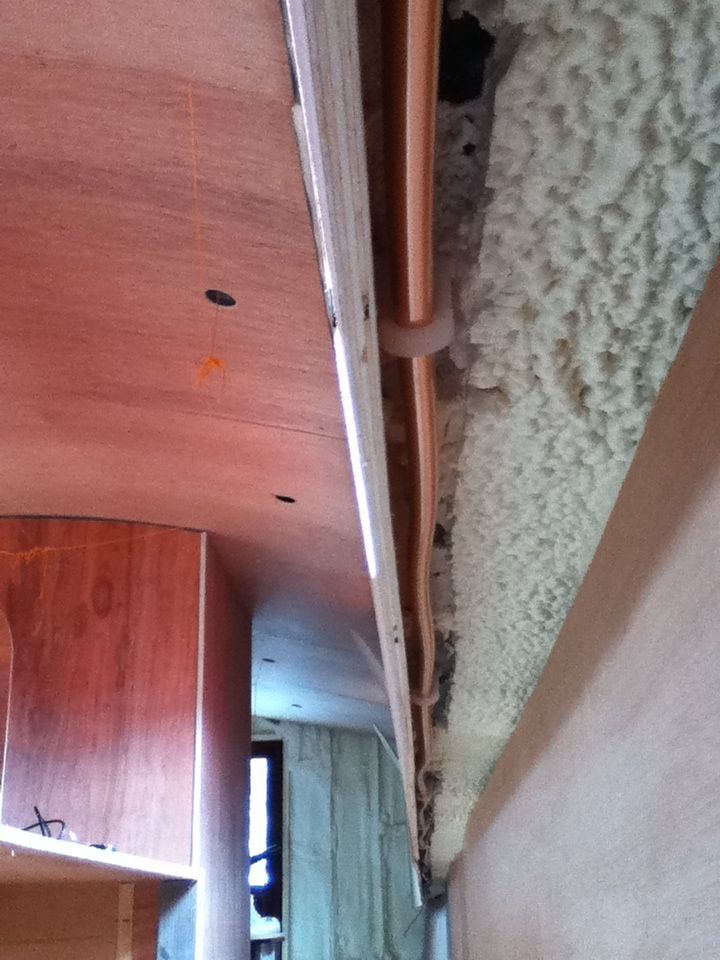
Even a new boat has condensation. Every morning the windows have droplits. Where I cut away insulation under the gunnel to run gas piping, condensation forms. (I'll use some sprayfoam soon to stop it.)
I'll try and keep the blog up to date and add some pics soon. :)
Friday, 7 September 2012
I havent posted anything, because since my last post, the family all came on board :) I'm using a battery under the bed to power the shower pump, water pump and toilet flush temporarily, 1 spot light in each room, and temp elec cabling. Other than that, everything is working. Gas appliances are in, hot water to the shower, etc etc. Main problems have been water leaks....my own fault. We have a sink with 3 sinks...all needing the outlets to be joined and sent out of a 1 and a half inch skin fitting. I used a hole saw and cut a hole for the sink, one for the basin and washing machine, and one for the shower pump outlet (3/4 inch skin fittings.)
I promise to take pics once the boat is cleaned up a little...dont want to go sticking up photos with clutter in the photo....
We received the sailaway on the 10th Aug ago, and began living onboard, with all the basic services intact, from the 23rd...about 2 weeks....a great accomplishment.:) Since then I've added a cupboard in the main bedroom, a desk, connected a dishwasher, washing machine, shower.
Still need to do the following:
1. install coal stove.
2. fit flooring in bathroom
3. properly fit the electrics
4. fit the 12v lights
5. fit the batteries properly, with isolator, fuse box etc. Currently on shoreline so have no need for 12V system.
6. Carpet main bedroom.
7. etc... :)
Thursday, 23 August 2012
I think it's about Day 10 now:)
The boat flooring has been laid, plus carpeting in the kids cabins.
I've fitted the Morco gas heater, and drilled/hacksawed through the roof. It wasnt the nightmare job I thought it might be....drilled 1 starter hole, and jigsawed my way around using cutting spray......great! Connected up a few gas compression glands.
Last night we retrieved the last of our appliances in storage (fridge,freezer,cooker etc), so I get to wire them up/pipe them in today.
This weeks tasks are:
1. drill and fit skin fittings for basin, shower, washer, sink,dishwasher.
2. connect up/assemble the shower.
3. connect up the cooker gas supply.
4. assemble a sofa.
5. cut kitchen tops to size and fit sink
6. make a plan to connect 3 sink outlets into 1.
7. cut bathroom wall to size
8. move toilet into boat.
9. connect temporary battery to water pump/shower pump
...all before Satureday, which is when we move ourselves off our old boat onto the widebeam, so we can start preparing the old boat for it's new owner, who picks it up a few days later.:)
Not a minute to lose....busy drinking a cuppa, and then I'm getting started. Pics will follow :)
Sunday, 19 August 2012
Day 8 :)
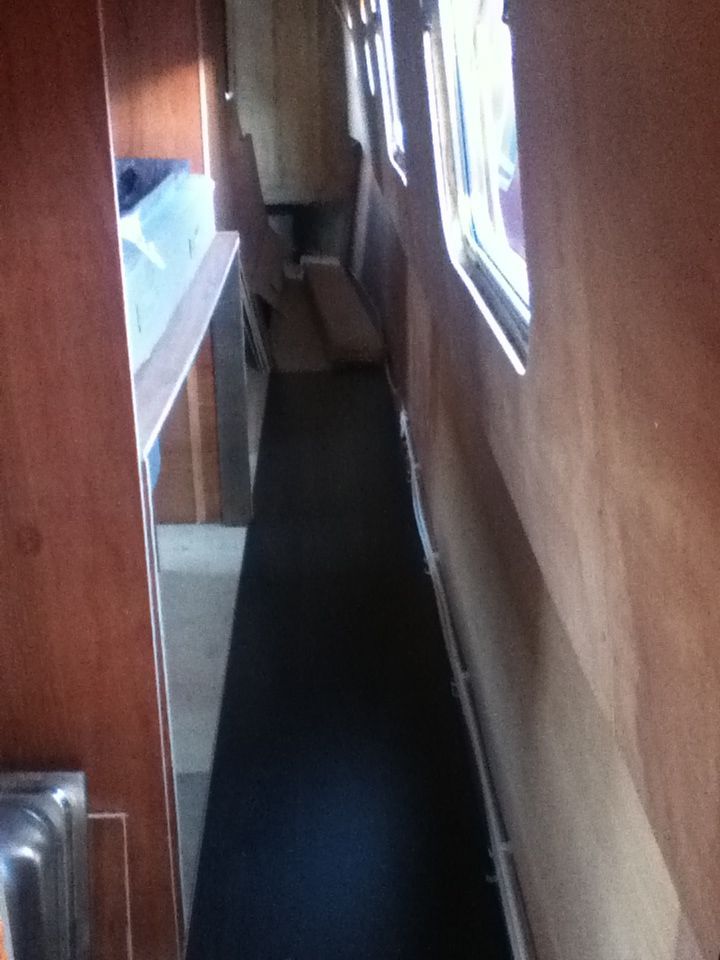
Yesterday we got to grips with putting down the flooring in the kitchen, saloon and passage...which was a great success, but really much harder than I thought it would be. Beware starting in the wrong corner:)
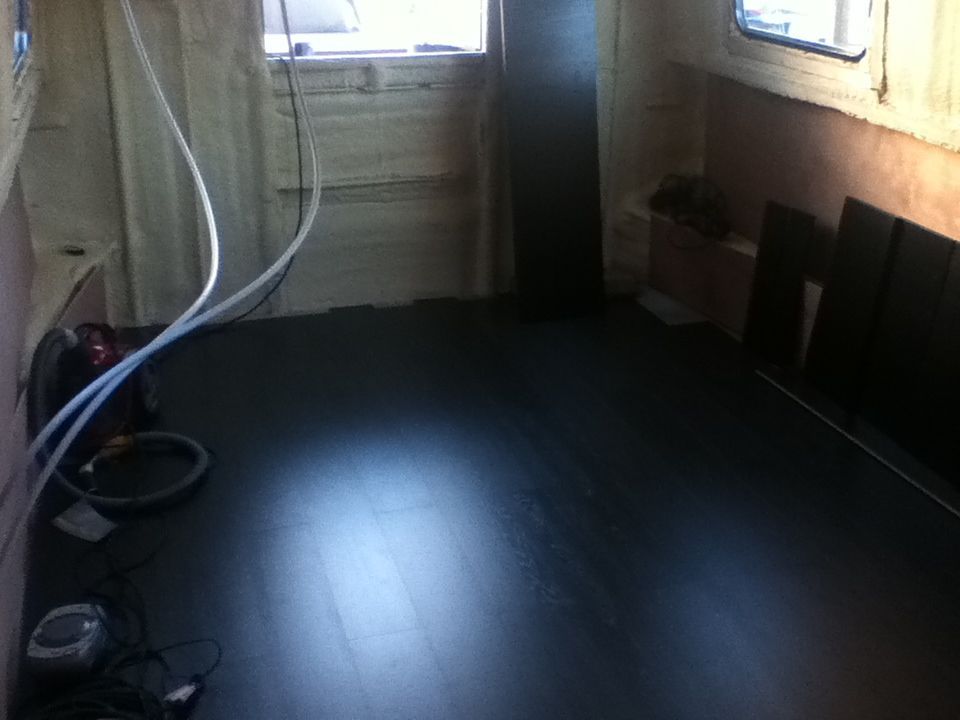
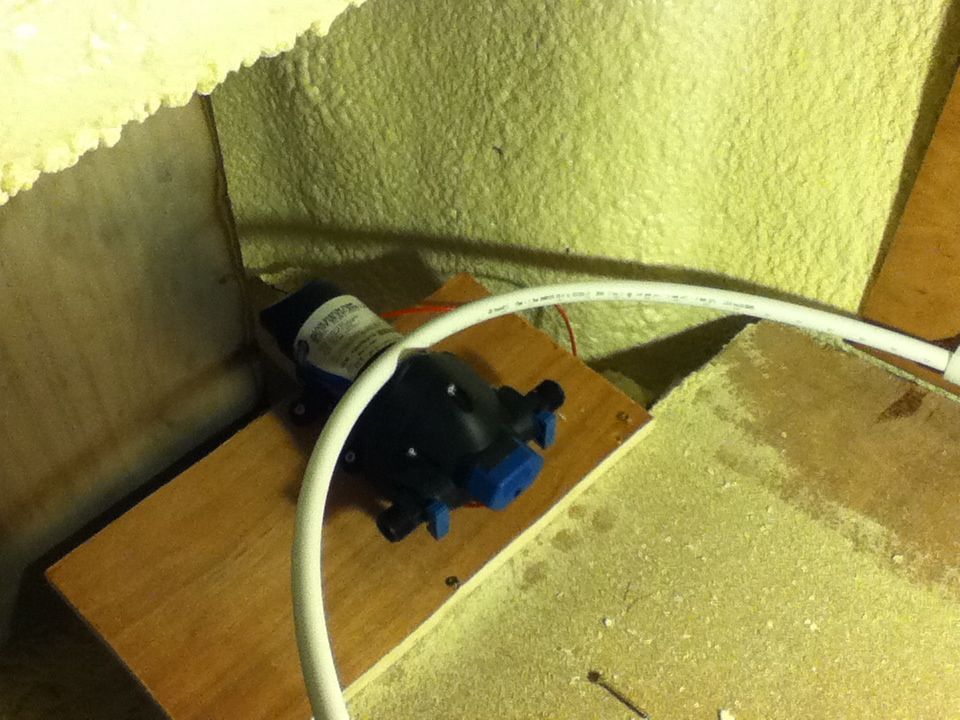
 Late last night we added underfoam for the kids cabins and put in one carpet. Doing the other today, and getting started on the kitchen cabinets (I think). Water pump is also semi installed.
Friday, 17 August 2012


continuing the update of Day 5,6,7.
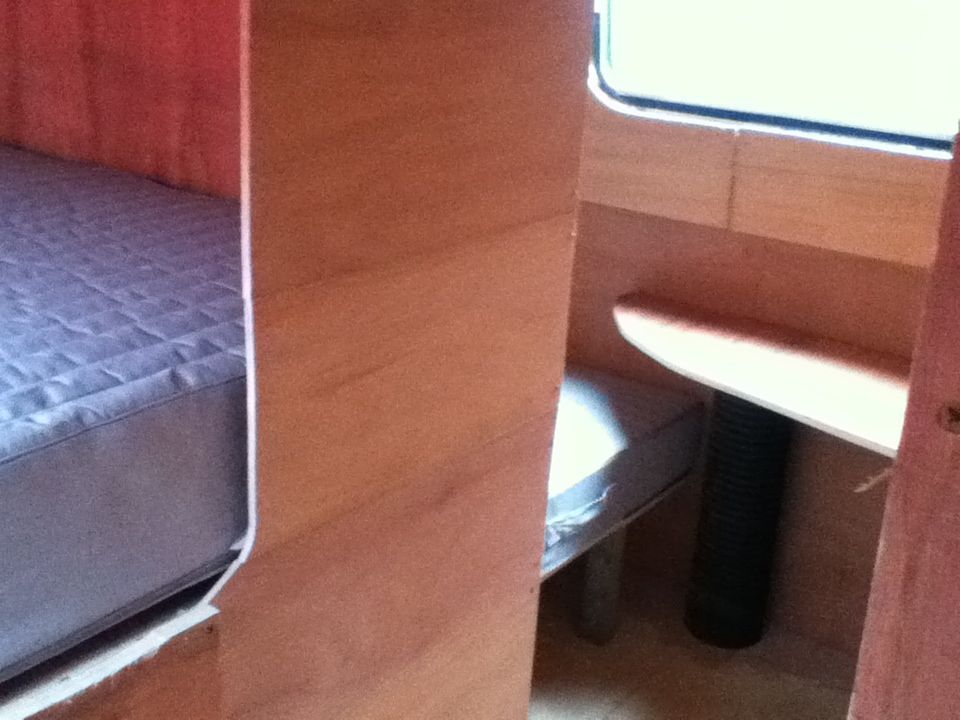
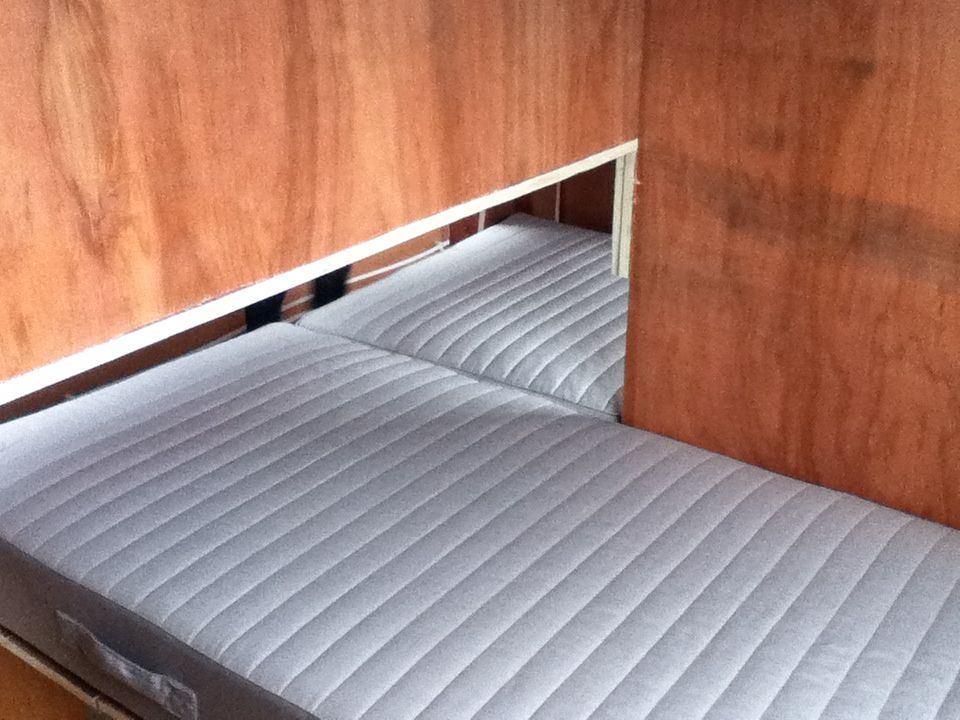
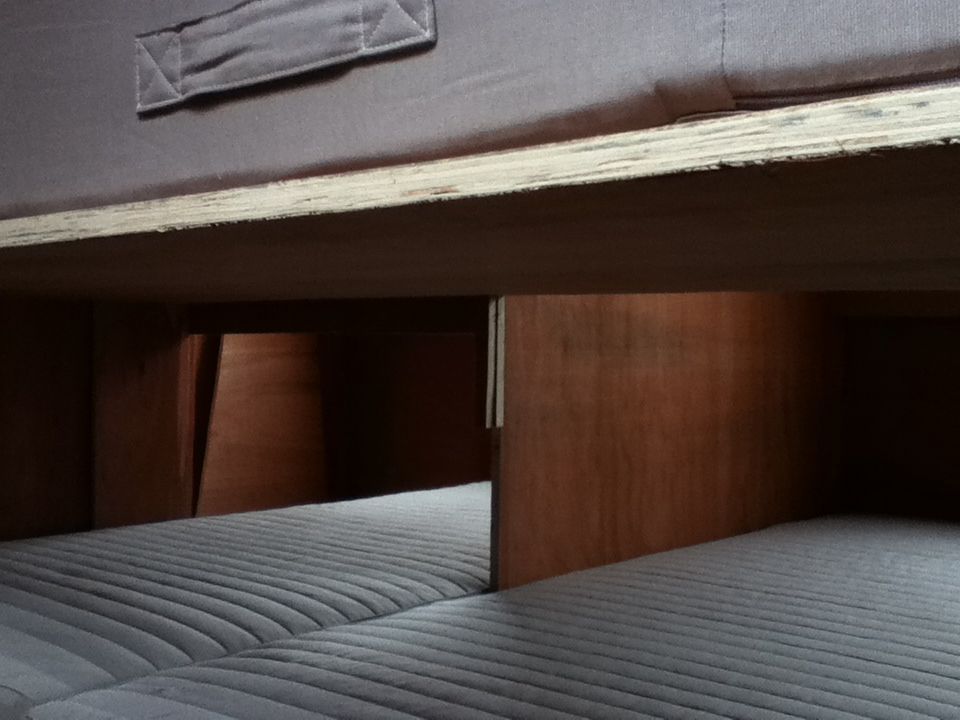
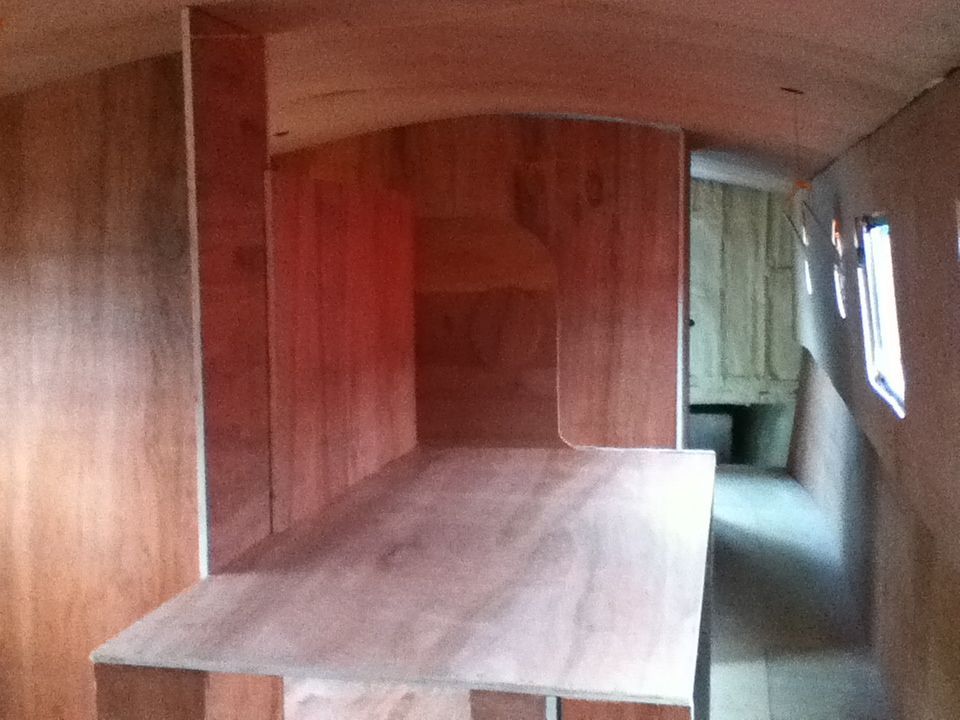
I built a bunk for the younger kid. I built 2 beds under it (at 90degrees). (Imagine 2 cabins...mirror image of each other, seperated by a bulkhead, with beds against the bulkhead....both feet under the bunk bed.
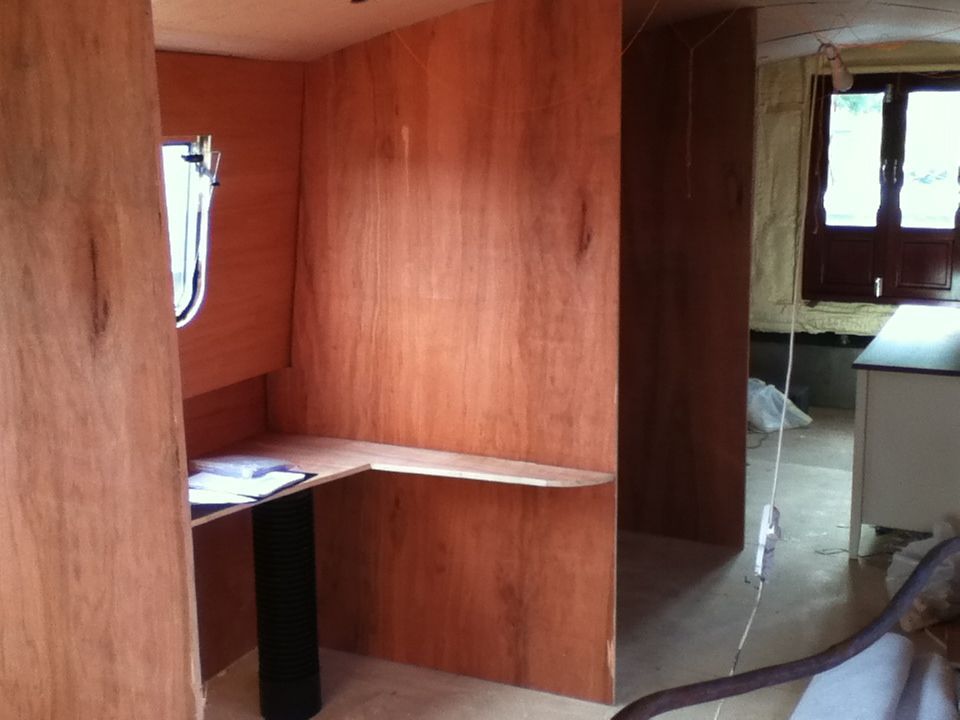
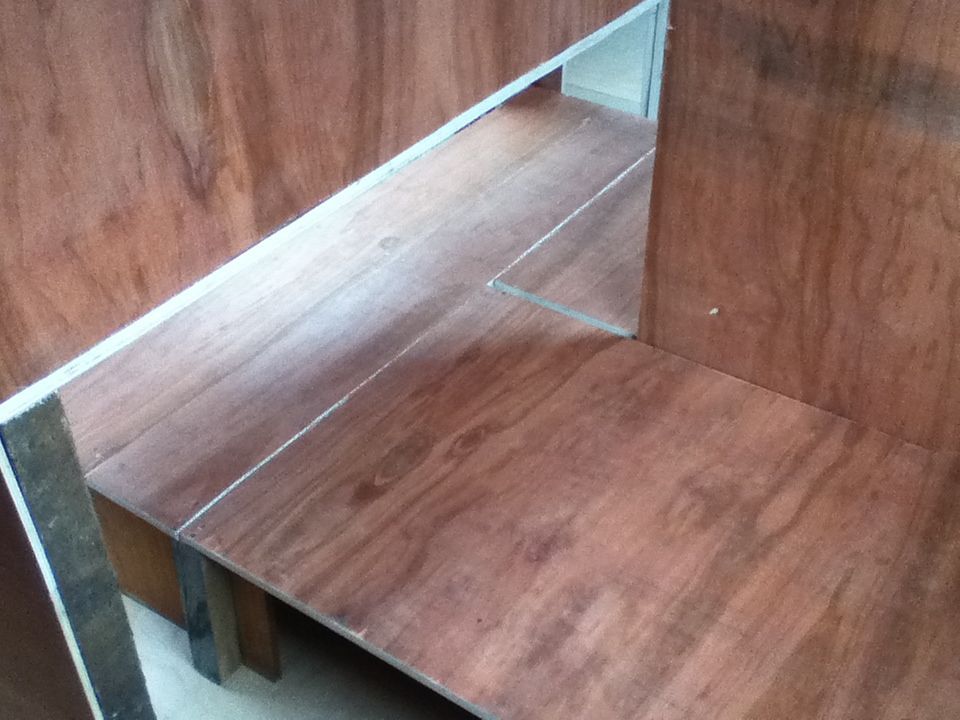 The pic below, shows the carcass of the bunk over the bottom beds. I've already built side walls so the 3 kids are seperated, so they have their own space.
Well....havent updated the blog for 2 days, because I've been rather busy :) I'll comment on the pics one at a time.
Day 5,6,7.
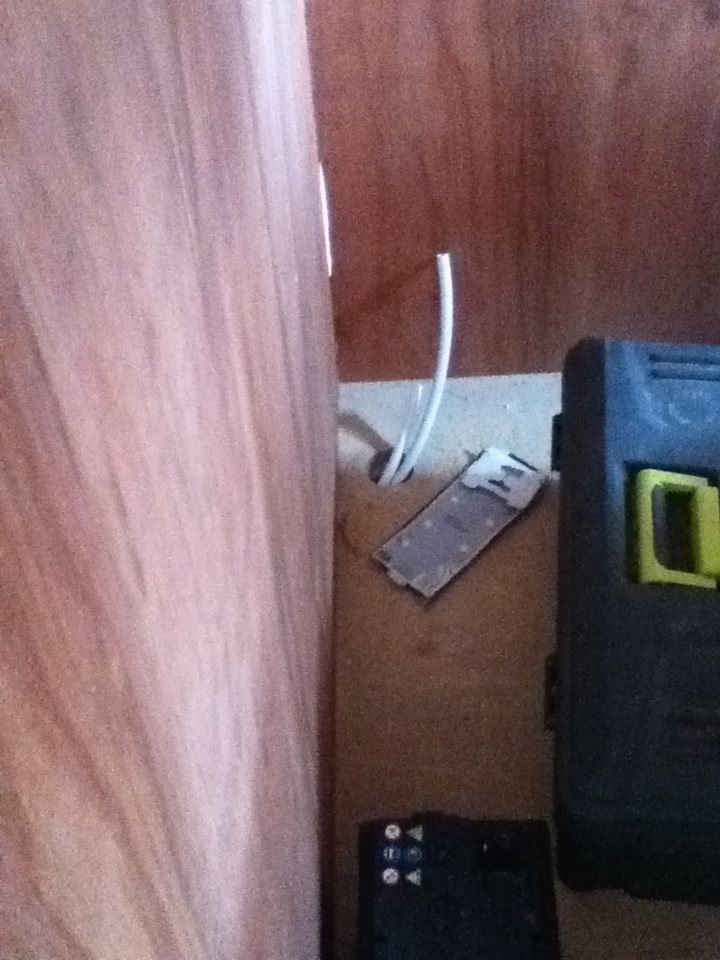
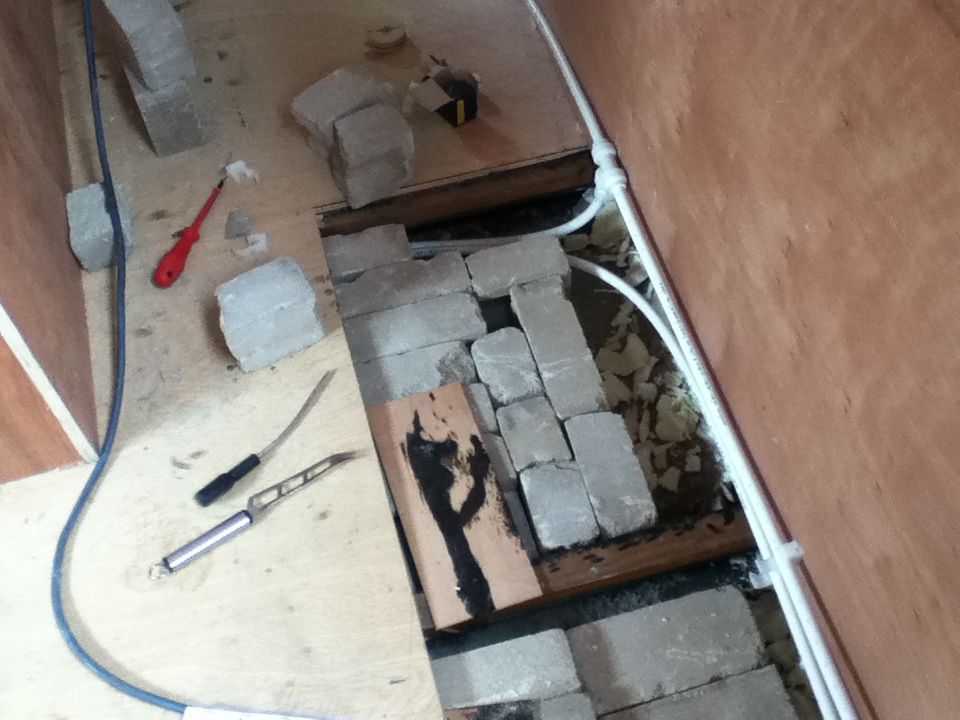 This pic shows how I had to make a space between some bricks to run the water lines across the passage to feed the shower, basin and toilet. The next pic will be the completed job. I kept the one pipe without any fittings...to avoid more risk of leaks. I used a T-Piece on the cold water pipe which was unavoidable.
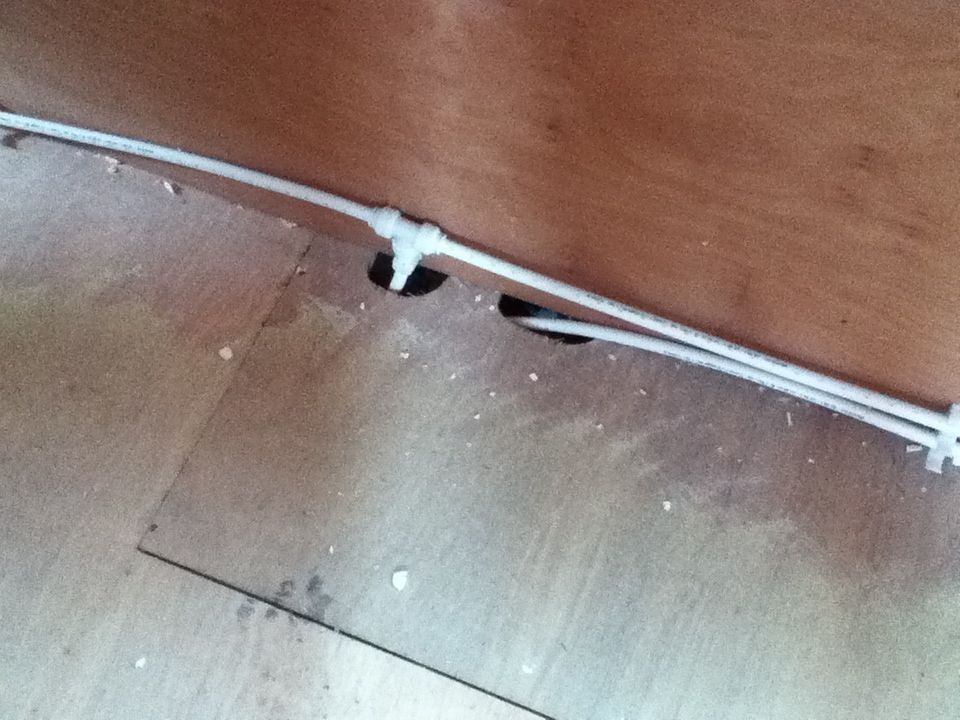 The pic below shows where the pipes pop up out the floor..ready to receive T-Pieces..to supply the shower..and contine to basin..and toilet.
Wednesday, 15 August 2012
Monday, 13 August 2012
Day4:
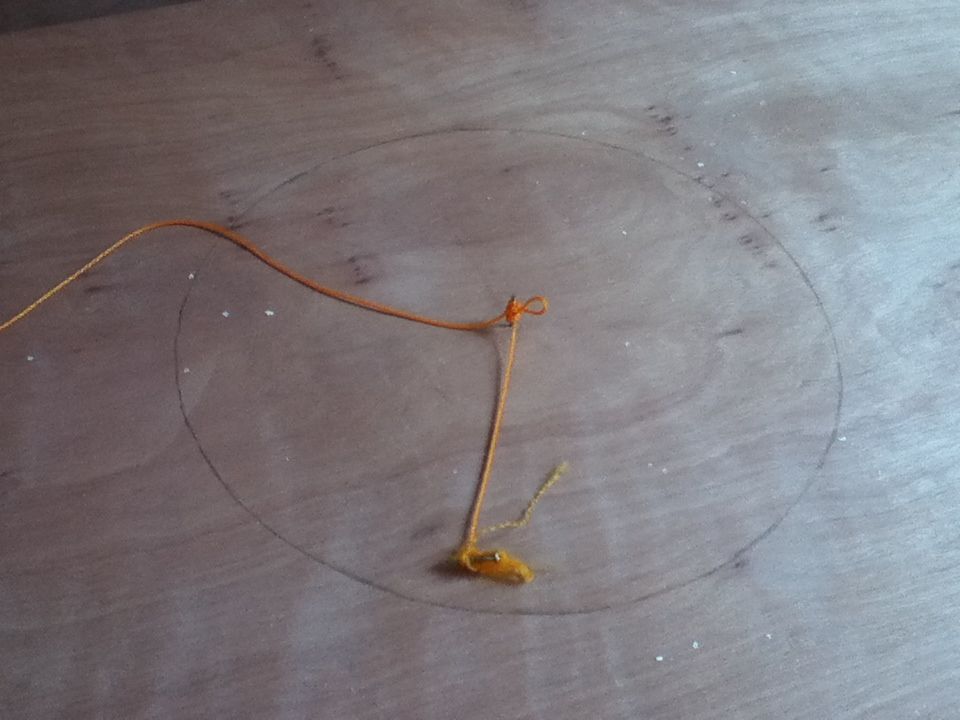
Started using an IPod to take pics..but the battery is dead, so will upload new pics shortly once it's charged. Ceiling ply is done. Started the top side ply boards today, which meant cutting holes for portholes and windows. Half done. Will finish the rest tomorrow, meaning there's hardly any spray foam to look at any more, and it's time to start doing bulkheads (walls) to seperate the different rooms. Discovered I forgot to clean the sprayfoam under the roof vents before putting up the ceilings, so will need to use a holesaw and cut holes from the inside out, ...and then fit some bug filter material, and end off with an inside vent cover for each.
Sunday, 12 August 2012
Day 3:
Started installing the ceiling boards today. Big job cutting more sprayfoam away. Had to screw small support strips of wood onto the side of each board, so where each board meets, they can be secured properly from behind...invisibly...keeping the seam quite neat. I had the help of my teenager, who has longer arms than me, and held each board up, while I frantically screwed it into place.....along each edge...(side edges) as well as where it met the previous board (across the boat). It all looks decent enough, and I'll eventually screw some beading to hide any joins that werent perfect. I drilled all the holes for downlights before installing the ceiling boards, but as the downlighters havent arrived from Ebay yet, I thread string through all the holes, so I can pull the 12V cabling through later...all connected in a central duct...running down the boat in the middle of the ceiling....pics will come later....unfortunately the teen is off to a youth camp for a week, and he's taking our camera with him...thus no pics unless I can get my netbook to use the webcam tomorrow :)
I think it's been a good 3 days..Sprayfoam cut back. Bottom side ply is in. Ceilings done. Tomorrow I'm hoping to do all the cutouts for windows etc, and install the side top ply. That will really mean the interior bulkheads can start going in...plus kitchen cupboards.... Nothing like having a deadline of 2weeks to get it all done...before the family take up residence.
Saturday, 11 August 2012
Day 2:
Another busy day. I had to install battons along the bottom sides..This involved drilling through the metal side plates with a 4mm drill, then half drilling with a 5mm in the same holes..and then screwing the wooden batton onto the metal with self tapping screws....
 Then I screwed the plywood sheets onto the battons. Today I finished almost all the bottom ply sheets. I tried mounting 1 ceiling board...had some trouble, until I decided to nail on a wooden plank all the boat...stern to bow....along each top corner....This gives an easy way of identifying where to screw from beneath when holding up the ceiling board (6mm ply). I then screwed the centre of the board to the top centre of the boat roof...direct onto the battons provided by the boat builder. Pics of this tomorrow. 1 installed, and looks good. I spent the rest of the day cutting back more ceiling spray foam...as it was in the way of the ceiling ply edges.


Friday, 10 August 2012
Well. What a day! Got stuck into the sprayfoam. Here's my early morning selection of "instruments".
 I very soon found that these 3....were the best for the job.
 The cheese knife has been wonderful. Sharp. Spiky. Cuts through harder bits with ease. The scraper cleared up behind the cheese knife, and the breadknife did a good job of getting behind strips of foam and "pinging" it off. After a few hours...I had cut back most of it......but still a bit to do on the roof tomorrow...which I figure I'll do as we put on each ceiling board.
 This afternoon the wood delivery arrived, but he only delivered to the marina gates, and I had to put 11 x 18mm ply, 20x9mm ply, and 12x6mm ply...on a small trolley ..and wheeel it to the boat. Took ages...and my body is dead. Had to get wife to help me load the whole lot into the boat through the stern doors...but eventually all done....ready for tomorrow. Planning on putting in some lower battoning..and screwing the bottom ply in place on both side.


Thursday, 9 August 2012


Wednesday, 8 August 2012
Day 1:
Very nervous. Have to get a few things together, and go down to collect boat. It has no front or back buttons at this stage, but I found some old tyres to stick on the bow so it doesnt scratch the lock gates :) Pics later. Thought I'd do a running daily account, with progress, so anyone interested in doing this kind of thing, will be able to follow some sort of time line.
Visited the new widebeam shell today :) It was ordered in June, and it's ready by August. That's good going. An affordable, economical shell, built to the builders spec, means there was nothing much to go wrong. They pump them out at about 1 per month at the moment, and no funds passed hands until the boat was actually built. Lymm Marina Boat Sales I had the handover this morning, ...and although I havent taken my own photos yet, these ones are relatively what I'm fetching in the morning.


Saturday, 4 August 2012
Sailaway shell arrives in 1 week.
We have a lot of appliances, kitchen tops, sinks, taps, cookers, fridge, freezer, dishwasher, plumbing piping and fittings, solid fuel stove, mattresses, etc in a little storage room. Just ordered about 40 items on Ebay...only to find that a bank card cuts off after 15 items...so we had to break the purchases into smaller groups....the courier is going to be driving back and forward permanently to our boat this week....let's hope everything arrives....just off the top of my head, some of the things arriving should be,,,:
stove flue, collar etc
electrical plugs
light bulbs and switches
electrical box and isolators
wire connector crimps and crimper
hole saw set
new jig saw
blades
drill bits
threading taps set
3x110V batteries
Gas fittings and piping
Fusebox
Got a few more things to order this week:
Water accumulator
Paint
Plyboard for the ceiling
Spotlight holders
Some things arriving after the boat arrives:
Flooring
Plywood for walls
all the things I've so far forgotten
The idea is, get the boat, get all the basics in as quickly as possible..so the family can move on board, and have the basics....them being:
electricity
water
cooking
beds
workareas for tv/pcs/xbox/printer/filing :)
Friday, 13 July 2012
Yes I know...it has been ages since I have blogged :) But there's a reason....I'm in limbo.....waiting for my new shell to be ready....so you'll have to wait. What I can confirm is, my wife has been shopping on Ebay for these:
220V fridge
220V freezer
220V dishwasher
handbasin for the bathroom.
shower enclosure and base
We went to Ikea and found they had a 25% sale on kitchen doors, so we've bought all of those...all waiting to be fitted.
We've got the shower pump and the main boat pump.
I had to catch a train all the way from Manchester to Liverpool...and then a connecting train to some little town, where I met a man on the platform, who gave me a 90 degree corner sink....for £50....the trains back only ran every hour and I ended up having to walk back through Manchester with the sink on my head :) Took the 12yr old with me on the trip, and visited a museam in Liverpool but he got nauseas and ended up being sick in a plastic bag with holes in it on the train home. FUN :)
We are officially beginning the big clean up and packaging of all our existing "stuff", ready for an orderly transition onto new boat in a few weeks. Not an easy task. First day in new shell, will be a lot of fun......5 people....in a sailaway shell....air mattresses on the floor...no lights, no water, no gas, no toilets.....but as usual, yours truly has a master plan. Instead of them all moaning, I'm setting them all to work as my building crew..."You want to make coffee?"...."you better build the kitchen then :)
This may sound mad or even humouress...but the truth is, that without a strong bond between a family, you cant attempt crazy things....which is why we've coped living in a narrowboat..and why we'll be very happy in a widebeam.
Things I have to buy in the next month are:
elec cabling.
lights
1 leisure battery and cabling to connect to the alternator.
plyboard.
plumbing piping and fittings
boat fenders
gas piping and fittings.
tools
On a personal note, we've decided we no longer need our little runaround car. The tax, MOT and repairs (gearbox and clutch need replacing) would be a few hundred pounds. The council has also decided it would be fun to charge us back charges on council tax...all the way back to October 2011 when we first arrived in the marina, although we only officially received a postal code this year in June. We've been fighting with them, and the final decision with the Valuation Office will be in the next 14days. Am I hopeful.....well I do believe in miracles...so lets pray for one:)
Things are beginning to get exciting now.....planning where the shoes go is a question I still dont have an answer for..............
Tuesday, 19 June 2012
Ramblings
Even though the boat shell will only be ready for collection in July/August, time moves very quickly, so there's no time to waste getting things prepared. I normally spend most of my time on CanalWorld.net forums, getting answers to a range of questions, from spray foam thickness, wall sheet thickness...to battery terminal tips.
Here's an interest post I've stolen, mainly in order to try and remember to do the same on my boat.
Talking about battery terminal posts...
My wifes got numerous items on Ebay watch lists....from taps, basins, gas cookers...and more. Today our undercounter fridge from Argos is ready for collection. No where to store it, but have to make a plan.
I have a master plan for day 1 on the boat.
Basically, you need to picture this in your head....the boat builder says...your sailaway shell is ready. I put the family on the train..get to the boat, start the key..travel 8hrs and get the shell back to the marina. Right...where to moor it...I have an arrangement with the marina management to stick it on visitor moorings for a month...(our old boat will still be using our berth). I need to get elec to the sailaway...so I'm going to try and negotiate a connection from one of the unused berth bollards :) I'm hoping there will be a few weeks between receiving the new shell, and having to move onboard, which will let me get the basic flooring/walling/ceiling boards up...however thats not guaranteed...which is where this master plan comes into play.
The backup master plan
Empty shell.
Family on board.
Run a temp elec supply using extensions down one side of the boat.
Run a temp hosepipe from boat water tank to temp water pump, connected to a temp 12V battery. This will supply the toilet flush and a temp tap near the kitchen for kettle refilling.
Kids bed mattresses on the floor in their "section". Double bed mattress near the bow. The stern doors and area of the boat will be the building zone, and I'll start on the walling, flooring, ceilings, kitchen worktops and fitting the appliances (washer, fridge, freezer, dishwasher, cooker, microwave, kettle, toaster). The workzone will run to the first bulkhead, which of course wont actually be there, but it might go up quite quickly so I have a work area border to work to. This will later be the seperation of kitchen/saloon, from the kids bedrooms etc. Once the kitchen/saloon area is relatively acceptable, we'll move our double mattress to that end, and I'll move the workzone to the bow area of the boat.
I'm thinking of fitting carpets down the passage, and in the kids rooms, and the master bedroom. Ikea flooring in the kitchen/saloon and the toilet/shower area.
Thats the plan. I'll run all the official electrics/12V supplies in a trunking under the gunwhale...and fit proper plug points, lights at a later date.
Here's an interest post I've stolen, mainly in order to try and remember to do the same on my boat.
Talking about battery terminal posts...
I have always used vaseline over the entire post and have no trouble despite high currents from our 175A alternator and 2.5kw inverter. When the boat was new, the posts were not well vaselined (in fact possibly not at all!) and it was not long before acid fumes started to corrode them. Fortunately I caught it early, bathed them in sodium bicarb (much fizzing!) and then applied vaseline to the exposed metalwork including the entire post surface. It has been great ever since.
My wifes got numerous items on Ebay watch lists....from taps, basins, gas cookers...and more. Today our undercounter fridge from Argos is ready for collection. No where to store it, but have to make a plan.
I have a master plan for day 1 on the boat.
Basically, you need to picture this in your head....the boat builder says...your sailaway shell is ready. I put the family on the train..get to the boat, start the key..travel 8hrs and get the shell back to the marina. Right...where to moor it...I have an arrangement with the marina management to stick it on visitor moorings for a month...(our old boat will still be using our berth). I need to get elec to the sailaway...so I'm going to try and negotiate a connection from one of the unused berth bollards :) I'm hoping there will be a few weeks between receiving the new shell, and having to move onboard, which will let me get the basic flooring/walling/ceiling boards up...however thats not guaranteed...which is where this master plan comes into play.
The backup master plan
Empty shell.
Family on board.
Run a temp elec supply using extensions down one side of the boat.
Run a temp hosepipe from boat water tank to temp water pump, connected to a temp 12V battery. This will supply the toilet flush and a temp tap near the kitchen for kettle refilling.
Kids bed mattresses on the floor in their "section". Double bed mattress near the bow. The stern doors and area of the boat will be the building zone, and I'll start on the walling, flooring, ceilings, kitchen worktops and fitting the appliances (washer, fridge, freezer, dishwasher, cooker, microwave, kettle, toaster). The workzone will run to the first bulkhead, which of course wont actually be there, but it might go up quite quickly so I have a work area border to work to. This will later be the seperation of kitchen/saloon, from the kids bedrooms etc. Once the kitchen/saloon area is relatively acceptable, we'll move our double mattress to that end, and I'll move the workzone to the bow area of the boat.
I'm thinking of fitting carpets down the passage, and in the kids rooms, and the master bedroom. Ikea flooring in the kitchen/saloon and the toilet/shower area.
Thats the plan. I'll run all the official electrics/12V supplies in a trunking under the gunwhale...and fit proper plug points, lights at a later date.
Wednesday, 13 June 2012
Nerves are beginning to rear up recently. The thought of having an empty shell, little time to fit the basics in order to survive, and getting things installed in the correct order etc...is quite daunting...HOWEVER....we're a family that performs well under pressure, so I've no doubt we'll get through it....blog will take off at that point with much to post. Until the shell is ready, there's not much to blog about, except to say we bought a 220V freezer for £60 at an auction....a small dishwasher on Ebay, and the stove from a forum member (still to arrive). Tomorrow we'll pick up a small 220V undercounter fridge from Argos. Since we only plan on doing any cruising next March, I'm fitting everything for 220V through an invertor or shore power plug. When we cruise, the freezer and dishwasher will be unused.
Friday, 8 June 2012
nothing much to report today, as we're waiting on the boat builder for confirmation of a possible early delivery date...which would be nice...but we shall see. Aug is the planned delivery date of the sailaway shell, and I'm trying to spend the next 2 months getting answers to any niggling questions I need answered BEFORE rather than LATER. I also have no real storage space right now to prebuy much...so it's a bit of a time-based game at the moment. :)
Tuesday, 5 June 2012
Holes to cut in the boat?
Without having given this any thought yet, (I'm only thinking about it now) , it seems to me I'm going to be cutting a number of holes in the roof of my new boat. I have never used a holesaw bigger than a 3 inches before, so cutting huge holes for flues, is going to be terrifying, although relatively simple I would think. I need one for the wood/coal stove flue. Another for the gas heater flue. Do I need one for the bathroom extractor fan? We are thinking of compacting the shower/toilet into a small area, and block off the porthole. This would mean an extractor fan is a good idea. Manual switch operation.
I need to cut a hole for the shower outlet, another for the sink drainage. One for the bathroom basin. A hole (internal) for the water pipe from the water tank. Another for the gas supply. Another to bring the elec wiring from the batteries into the living areas.
I've asked the wonderful people at CanalWorld.net for their help on this..which you can follow here
Plugpoints - up or down
One of the issues in a boat is wiring neatness. Fitting out a boat gives you the opportunity to put plug points EXACTLY where you might want them. If you ever intend selling your boat, then getting too "arty" with your plug point locations, could be an issue, as most people would prefer a standard placement. The easiest, would be to put a wiring "skirting box" all along the floor level, and put plug points on the outside of that skirting box. I dont think this is ideal, but it may be the way I do it. I could then run a normal 1metre multiplug box, from the skirting area...inside the ply walling, and up to waist height, perfect for things like bedside lamps, kids desks, kitchen appliances etc. I could run the 220V electrics in a skirting box just under the gunwale, and fit the plug points at that height. I'll run 2 "feeds" , one down each side of the boat, from 16Amp trip switches. I'll run a seperate one for kitchen appliances, from it's own trip switch. This should stop things tripping out when the kettle, toaster, and vacuum cleaner are all going at the same time. The thought process is as follows:
Bedroom - side lamps. Fed at floor level.
Kids desks - fed at waist level.
Vacuum cleaner - fed at floor level.
Kitchen appliances - fed from waist/table top level.
TV in saloon - fed from waist high.
Lamps in saloon - fed from ceiling height.
Lamps in kids rooms - fed from ceiling height.
Spot lamps in kids rooms - fed from waist high (sits on desks or wired as reading lights)
Hair drier plug - waist high
Laptop plugs in all rooms - floor height.
Printer plug - waist high.
TV in kids rooms - waist high
TV in main bedroom - waist high.
So basically, in short....it looks like I'm going to have to have plug points at foot level AND waist level, for appliances, and hardwire lights from head height. If you buy a fully fitted boat, you have to live with where the previous owner had plug points. I'm hoping that part of fitting a boat ourselves, means plug points will be EXACTLY where we need them...and cut down on too many wires hanging, re-routing, and getting in knots. Cutting the supply cable for every appliance to a half metre, sounds like a great idea.
Monday, 4 June 2012
Boat Stove Purchase
Boat stoves can sell for hundreds of pounds. When you haven't got hundreds of pounds, you're thankful when a good deal comes your way. I've managed to get this one, for £150 from someone who got it for a project and no longer needed it. I checked with a few forum members whether Chinese stoves were any good, and 2 responses said they had used them for a few years with no problems, so I sealed the deal with the seller as soon as I could, and awaiting delivery in the near future.
If you look at the post showing the proposed layout of the stove, you'll notice it's in the corner...away from the passage. In winter it's important to get the heat moving around the boat, which is going to be tricky (even with an ecofan). I may fit a piece of ducting along the roof on the stove side...and have a 12V extractor fan at roof height, which will pull the hot air above the stove...down the length of the boat....exiting into each room. The issue with that though...is that hot air will remain at ceiling height...when it's actually needed at feet height. I'll probably put carpeting in the bedroom zones, and live with it. I'm not putting in a back boiler, and radiators. Last winter, we used a small 600Watt oil heater in our narrowboat back cabin, and it was more than enough....and we plan to stay in a marina with elec power through every winter.


The list of appliances we're planning on having on the boat is:
Washer / Drier / Dishwasher / Microwave / Fridge / Freezer / ...to name but a FEW. Moored in a marina over the winter, it'll be great to have all these. We currently have a low wattage washer...about 600Watts...but to be honest, using it through the winter is hard work.....something bigger is required. But....something bigger....does not compute with daily life out of a marina. Most people run their washer/drier when the boat is under way. At that point the alternators are working hard to recharge/supply batteries. Microwave is for marina use only. Elec kettle and hairdriers...all marina use only. Freezer...marina use only. So why not get a 12V fridge you ask ? The price, I say. I MAY look for one on Ebay....but only if I find one which is 12V AND 220V. (or 3 way with gas is even better). I didnt enjoy having to keep my batteries charged to the max, all through winter, just because my wife wanted the freezer on, and it was ONLY 12V...meaning I couldnt flip it over to 220V if I had wanted to. An unneccesary headache. The big question is....will we be in a marina most of the time or cruising. The answer....truthfully....in the marina...because our son starts college in the area in Sept....BUT.....I hate being in a marina....the Bridgewater canal is near by, and I am VERY tempted to stay on the River Weaver for some time, and put him on a train each morning. (Easier said than done). Darn it. I am going to try and do this the 220V way. Lots of batteries. Spare generator. Solar panels when I can afford it. I dont care. You have to make a decision one way or the other and MOVE ON.....there are other reasons....I dont like all those low powered, high current cabling you need for 12V appliances. 220V cabling throughout. Simples.
Sunday, 3 June 2012
The new boat is arriving with 1 starter battery and no leisure batteries. It has a smaller alternator fitted to recharge the starter battery, and a 175Amp alternator for charging the leisure batteries once I fit them. So, again, I'm facing the old age issue of batteries, recharging, and ensuring we have enough power onboard when disconnected from our marina. (which if I have my way will be as often as possible.)
Generating power is a long subject. The solutions are solar, generator, or running the boat engine. Basically, it all begins with how much power you demand, in order to be happy. If I tell the kids, computers and XBox are off, for 3 weeks while we cruise, they aren't the happiest.
One option is to have a BIG bank of batteries...which you charge up on shorepower before leaving on long trips...and then hope the alternator recharges them while you cruise.
The other option is to have less batteries and buy a gennie, or solar panel. In my experience, if you are a heavy power user, the solar panel wont keep up with your continual drain of battery power. Solar is fine if you only use a few appliances (like a laptop), but I have some suspicions that solar lies to the invertor. While the sun is shining, the battery voltage shows a high value...but when the sun is gone, the battery voltage can dive down to it's actual value....and suddenly your invertor is beeping....and you say to yourself....we had sun all day.....but of course you were taking all the amps the solar panels were supplying and eating them up...and not leaving anything over to recharge batteries.
When not on shorepower, I tend to switch an inverter on permanently. Mainly because I dont have 12V supplies for our tvs, laptops, cell chargers etc. ...everything runs off 220V. Lights are 8Watts energy saving bulbs, and you only need one in each room, just like in a house. They work well on side walls in half moon lamp holders. We're having a 220V fridge...cheap £100 from Argos or Tesco. Same with the freezer. (which we will switch off when away from a marina.) I know the invertor uses some battery power to run, but I'm going to live with it. The challenge therefore, is to not allow the battery voltage to drop below 11.9Volts, else the invertor will beep, and we'll lose power to everything. (for this reason, I'll have a few 12V LED lights installed as backups as well....
anyway...we have yobs outside the boat...so cutting this short :)
Fitting out a widebeam (or any boat), becomes something all consuming. You find your mind thinking about different aspects of the project every hour of the day. Everything is viewed in the shadow of "the project". I dont think that will change until the last item is in place. When we moved onto a narrowboat we had to downsize and get rid of so much clutter we had collected in a house the previous 2 yrs. Now that we face moving from a narrowboat to a widebeam, it's very strange to once again be thinking of what we can throw out...rather than how much extra space we'll have. The reason I guess is that the widebeam allows us to give the kids their own space, while still having a main bedroom and a saloon area. At the moment, we dont have those luxuries. Giving the kids their own rooms however, means a lot of our clutter, really has to be re-organised....not an easy task. Of course I've planned the main "areas" of the new boat, but there's so much I havent planned. Where does the vacuum cleaner get stored. What about the ironing board. At the moment its down the side of our fridge. We dont want the same on the widebeam. What about all the shoes. 2adults and 3 kids = piles of different functional shoes. Jackets? They take up soooo much space. Tools? Coal? It's all the things you dont actually want to see, but you need them "around". I've watched some great YouTube videos on how to make the most of limited space. I'm going to make use of all the options. :)
Is a widebeam actually a bigger living space to a narrowboat? It might seem a stupid question, but up to date, the kids have all been adjusting their living areas (dinette and saloon) each night, into bedrooms. (well the dinette has never actually been used as a dinette for a year, as the teenager has all his stuff arranged like he wants it....which does not blend with multi-use of a room :) Currently the saloon has massive storage areas under the sitting areas. Same in the dinette. Under the bow is a huge storage zone, and the back cabin has storage boxes under the seat areas. There are cupboards in the passage for our clothes, and loads of storage for food/pots/pans etc. My great plans for the widebeam, currently exclude all these wonderful storage areas, and my wife is putting pressure on me...shouting..."I had a dream last night...! Where's the vacuum cleaner going? In my shoe cupboard????" I couldnt let her know my thoughts to that....shhhh....they were..." I havent planned a shoe cupboard actually". OMG. I just remembered we have 5 guitars......not to worry I tell myself........it will all come together.....ROFL.

Saturday, 2 June 2012
So...how do you fit out a widebeam :) The question has gone through my head a few times already. To be honest, having lived on a narrowboat for a year, I've become accustomed to the way my old boat worked. I was fortunate during the past year, to experience most of the challenges that life on a boat with a family can throw at you. I've also gotten used to certain appliances, and have decided to fit the widebeam with the same types of things. Coal/wood stove for heating. Gas heater for heating water. Jabsco 20psi water pump. etc etc. It's important I think that when you fit out a boat, you should have some experience on previous boats so you know what to expect at the end of it. Equipment can be costly, and I'm on a shoestring budget. Here's a list of the work and items we're planning on fitting in the new boat.
1. Tongue and groove type flooring.
2. Ply walls and ceilings.
3. Jabsco water pump.
4. Morso gas water heater.
5. Wood/coal stove.
6. Kitchen cupboards. Make the frames. Buy the doors and work surface.
7. Water filter and accumulator.
8. Gas piping to cooker, heater.
9. Plumbing to kitchen, shower, toilet.
10. Seperating walls for bedrooms, shower/toilet/main bedroom.
11. Kitchen and saloon is open plan.
12. Layout is reverse...kitchen and saloon lead onto back stern area for entertaining. (table/chairs)
13. Connecting leisure batteries, isolators, fuses, inverter.
14. Connecting 220V wiring, isolators, plugtops,lighting.
15. Using low wattage 220V lights mostly. Some 12V led lighting as a backup.
16. holes for shower and sink drainage.
17. work desks for kids.
18. window blinds.
19. Cupboards for all the clothes.
20. A hinged bass for main bed, for extra underbed storage.
21. tv unit in the saloon.
22. Fitting all kitchen appliances. Fridge. Freezer. Cooker. Dishwasher. Washer. Drier. Microwave.
23. Lighting.
24. Paint outside of boat.
25. Fire equipment and smoke, CO alarms.
I'm sure I've forgotten something? :)
Well. This should be a long and interesting blog, that's for sure. After a year on our previous boat AreWeThereYet , we have decided to tackle a new project...something like climbing Mt Everest perhaps. We've signed the contract for a new widebeam sailaway, from Lymm Boat Builders which we should receive sometime before mid August, hopefully sooner. I thought I'd focus this blog on every thought process we go through regarding the preparation for the build, the actual build, and the final result. It's going to be a journey...a great adventure...with lots of lessons to learn...lots of pain...and lots of gain, we hope.
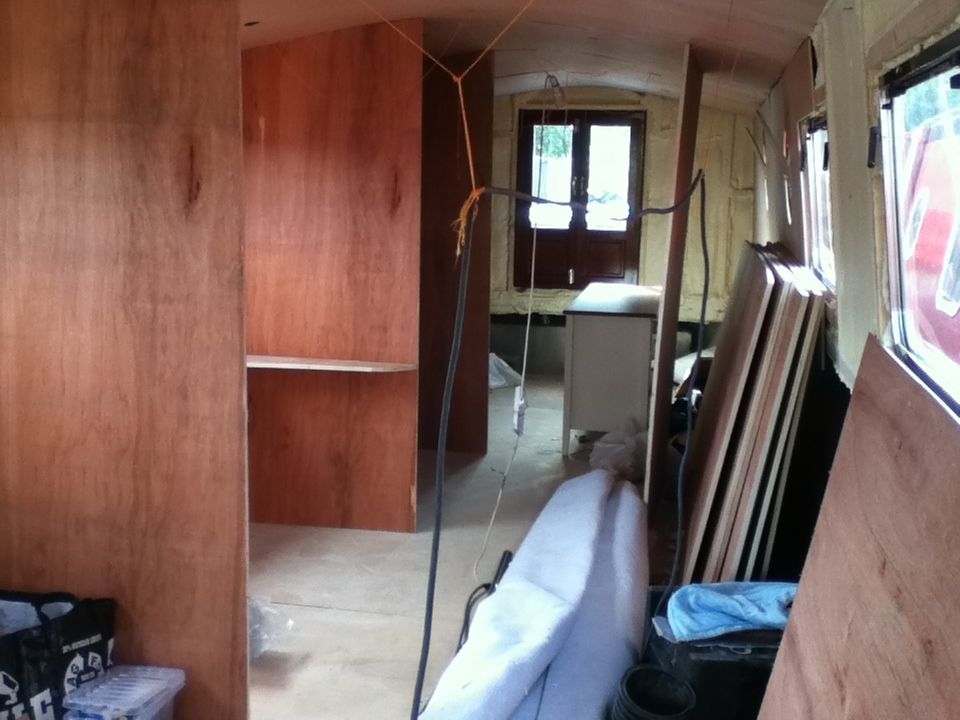
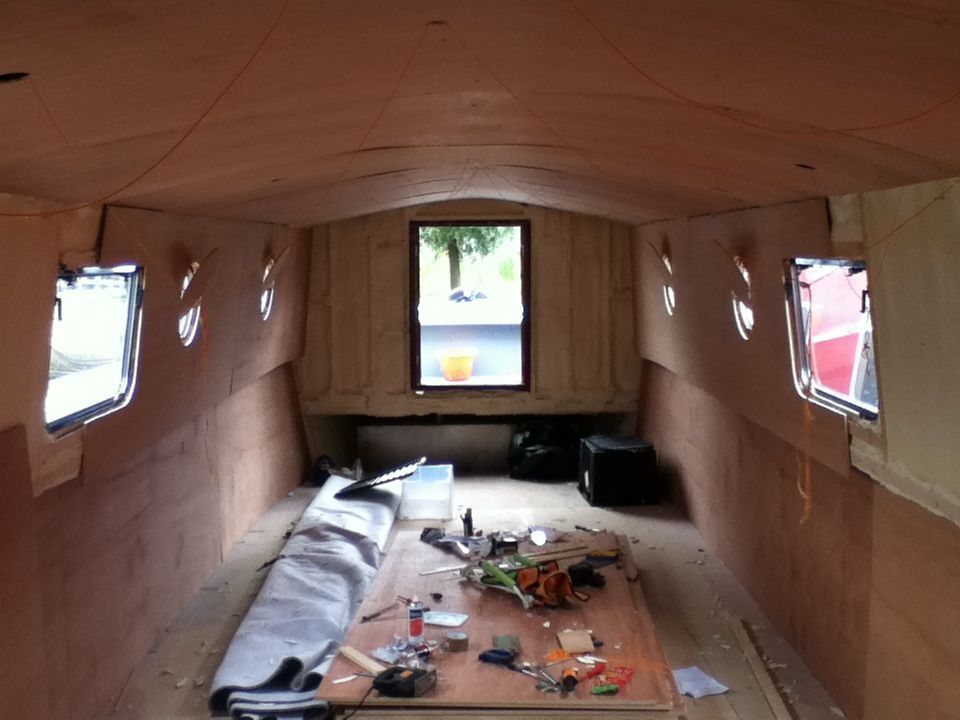
To date, we've been down to the boat yard and walked around the inside of other widebeams, putting masking tape down to check our measurements, and drawn up a floorplan to give the builders, as they need to know where to cut windows etc. We dont have the funds to get a fancy sailaway, so we've gone for an unpainted, unlined boat. To clarify, this is the cheapest form of sailaway....effectively an empty metal shell, painted in primer, blacked hull, spray foam interior insulation, and an engine, so you can drive off in it. My wife asked me the other day....what do you do first....I said....I have no idea :) Here's a pic of a sailaway interior.
So, now you know what we have to tackle ahead of us. What I didnt mention is...we have a cat, and 3 children. When we receive the boat, they will have no where to sleep. There will be no toilet. There will be no kitchen. There will be no heating. There will be no shower. There will be....erm....anything. Just an empty shell. Luckily, we have a mooring in a marina with toilets, shower, washing machine, but it's going to be a race to get the basics in place as quickly as we can. Some people take 2 years to fit out a boat. I'm hoping to have floors, walls, ceiling, bulkheads in place within a week, and services in, soon after. We shall see.
This blog should serve as a great reference to anyone planning on doing the same. We also have a very limited budget. There will be a lot of finding items on Ebay, on sale, etc. (in other words I will NOT be buying 10 screws at a time from B&Q, and I WILL be buying Eastern Africa Ply at £8 a sheet, instead of oak veneer ply at £25 a sheet.
I did 15yrs as an instrument mechanic as a trade, so I'm quite confident in my abilities to do woodwork, plumbing, elec cable connections, flooring, painting etc. Anything I dont know, I'm going to reference off the web, and ask CanalWorldForum :)
I guess this will do as my first post. Feel free to take the journey with me...it's going to be an interesting and bumpy ride, but the destinations going to be worth it.
Subscribe to:
Posts (Atom)